Technologies Used
Project Gallery
Description
Prerequisites
Before proceeding, make sure you have the following prerequisites:
- Kubernetes cluster up and running.
kubectlcommand-line tool installed and configured to access your Kubernetes cluster.- Basic knowledge of Kubernetes concepts and YAML configuration files.
Step 1: create a namespace
To get started, create a namespace inside k8s Cluster, to do that you can simply run the following command:
kubectl create ns demo-elastic
Step 2: create persistent volume For Data-elastic
- Create a file called
elasticsearch-pvc.ymland add the following YAML configuration:
---
apiVersion: v1
kind: PersistentVolumeClaim
metadata:
  name: elasticsearch-pvc
  labels:
    component: elasticsearch
spec:
  # storageClassName: standard
  accessModes:
  - ReadWriteOnce
  resources:
    requests:
      storage: 1G
---
2. Apply the configuration to deploy PVC:
kubectl apply -f elasticsearch-pvc.yaml -n demo-elastic
Step 3: Deploy Elasticsearch
- Create a file called
elasticsearch-deployment.yamland add the following YAML configuration:
apiVersion: apps/v1
kind: StatefulSet
metadata:
  name: elasticsearch
spec:
  serviceName: elasticsearch
  replicas: 1
  selector:
    matchLabels:
      component: elasticsearch
  template:
    metadata:
      labels:
        component: elasticsearch
    spec:
      containers:
      - name: elasticsearch
        image: docker.elastic.co/elasticsearch/elasticsearch:7.12.0
        imagePullPolicy: IfNotPresent
        env:
        - name: discovery.type
          value: single-node
        ports:
        - containerPort: 9200
          name: http
          protocol: TCP
        volumeMounts:
        - name: elasticsearch-config
          mountPath: /usr/share/elasticsearch/config/elasticsearch.yml
          subPath: elasticsearch.yml
        - name: elasticsearch-data
          mountPath: /usr/share/elasticsearch/data
        resources:
          limits:
            cpu: 500m
            memory: 4Gi
          requests:
            cpu: 500m
            memory: 4Gi
      # Allow non-root user to access PersistentVolume
      securityContext:
        fsGroup: 1000
      restartPolicy: Always
      volumes:
      - name: elasticsearch-config
        configMap:
          name: elasticsearch-config
      - name: elasticsearch-data
        persistentVolumeClaim:
          claimName: elasticsearch-pvc
1.2 Apply the configuration to deploy Elasticsearch:
kubectl apply -f elasticsearch-deployment.yaml -n demo-elastic
1.3 Create a file called elasticsearch-service.yaml and add the following YAML configuration:
apiVersion: v1
kind: Service
metadata:
  name: elasticsearch
  labels:
    component: elasticsearch
spec:
  type: NodePort
  selector:
    component: elasticsearch
  ports:
  - port: 9200
    targetPort: 9200
1.4 Apply the configuration to service Elasticsearch:
kubectl apply -f elasticsearch-service.yaml -n demo-elastic
1.5 Create a file called elasticsearch-configmap.yaml and add the following YAML configuration:
apiVersion: v1
kind: ConfigMap
metadata:
  name: elasticsearch-config
  labels:
    component: elasticsearch
data:
  elasticsearch.yml: |
    cluster.name: Demo-Elastic
    node.name: Master
    path.data: /usr/share/elasticsearch/data
    http:
      host: 0.0.0.0
      port: 9200
    bootstrap.memory_lock: true
    transport.host: 127.0.0.1
    xpack.license.self_generated.type: basic
    # Enable xpack.security which is provided in basic subscription
    xpack.security.enabled: true
    # Disable unused xpack features
    xpack.monitoring.enabled: false
    xpack.graph.enabled: false
    xpack.watcher.enabled: false
    xpack.ml.enabled: false
With the following command, we can now set up passwords for built-in users and install Elasticsearch to our cluster. During kibana and fluentd configuration, we’ll employ “elastic” users.
Disclaimer: I recommend enhancing the use of credentials in your production deployment by using Secrets over Configmaps, using distinct users for Kibana, and becoming more familiar with the least access concept.
$ kubectl exec -it elasticsearch-0 -n demo-elastic -- bin/elasticsearch-setup-passwords auto -b

...
##Changed password for
user elasticPASSWORD elastic = ismail-wajdi-7415b3176
- 6 Apply the configuration to config-Map Elasticsearch:
kubectl apply -f elasticsearch-configmap.yam -n demo-elastic
Step 4: Deploy Kibana
1.1 Create a file called elasticsearch-kibana.yaml and add the following YAML configuration:
apiVersion: apps/v1
kind: Deployment
metadata:
  name: kibana
spec:
  selector:
    matchLabels:
      component: kibana
  template:
    metadata:
      labels:
        component: kibana
    spec:
      containers:
      - name: kibana
        image: docker.elastic.co/kibana/kibana:7.12.0
        env:
        - name: ELASTICSEARCH_URL
          value: http://elasticsearch:9200
        - name: XPACK_SECURITY_ENABLED
          value: "true"
        - name: ELASTICSEARCH_USERNAME
          valueFrom:
            configMapKeyRef:
              name: kibana-config
              key: elasticsearch_username
        - name: ELASTICSEARCH_PASSWORD
          valueFrom:
            configMapKeyRef:
              name: kibana-config
              key: elasticsearch_password
        envFrom:
        - configMapRef:
            name: kibana-config
        ports:
        - containerPort: 5601
          name: http
          protocol: TCP
1.2 Apply the configuration to deploy Kibana:
kubectl apply -f elasticsearch-Kibana.yaml -n demo-elastic
1.3 Create a file called Kibana-service.yaml and add the following YAML configuration:
apiVersion: v1
kind: Service
metadata:
  name: kibana
  labels:
    component: kibana
spec:
  type: NodePort
  selector:
    component: kibana
  ports:
  - port: 5601
    targetPort: 5601
1.4 Apply the configuration to service Kibana:
kubectl apply -f Kibana-service.yaml -n demo-elastic
1.5 Create a file called Kibana-configmap.yaml and add the following YAML configuration:
apiVersion: v1
kind: ConfigMap
metadata:
  name: kibana-config
  labels:
    component: kibana
data:
  elasticsearch_username: elastic
  elasticsearch_password: ismail-wajdi-7415b3176
1.6 Apply the configuration to config-Map Kibana:
kubectl apply -f Kibana-configmap.yaml -n demo-elastic
Step 5: Accessing Elasticsearch and Kibana
Before proceeding, make sure you have the following prerequisites:
1. Obtain the external IP addresses and Port of the Elasticsearch and Kibana services:
kubectl get svc -n
NAME                          TYPE        CLUSTER-IP      EXTERNAL-IP   PORT(S)          AGE
elasticsearch                 NodePort    10.233.39.51    <none>        9200:31012/TCP   6h12m
kibana                        NodePort    10.233.5.197    <none>        5601:32398/TCP   6h4m
2. Once you have the external IP addresses, you can access Elasticsearch and Kibana using a web browser or tools like cURL or a REST client.
3. Accessing Elasticsearch: Open a web browser or use a tool like cURL and visit http://<elasticsearch-external-ip>:9200. If Elasticsearch is running successfully, you will see information about the Elasticsearch cluster, confirming that it is accessible.
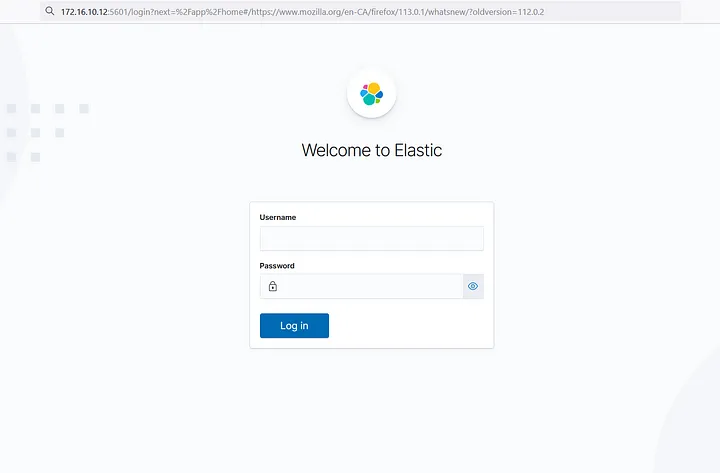
4. Accessing Kibana: Open a web browser and navigate to http://<kibana-external-ip>:5601. This will take you to the Kibana login page. Enter the elastic username and the password generated during the setup process. Once authenticated, you will have access to the Kibana dashboard, where you can explore and analyze data, create visualizations and dashboards, and perform various tasks provided by the Kibana interface.
By following these steps, you have successfully deployed Elasticsearch with a Kibana instance on Kubernetes, along with password protection. You can now access Elasticsearch to interact with the data and open Kibana to leverage its powerful features for data analysis and visualization. The external IP addresses obtained allow you to access Elasticsearch and Kibana securely from a web browser or through API calls, ensuring that only authorized users can access and utilize these services.
